
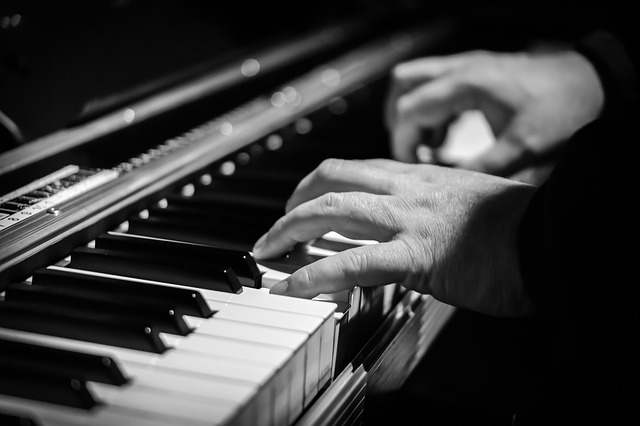
Piano Fingering: How to Use the Correct Fingers
Piano fingering is the choice of which fingers you use to play each note. Good fingering can make a passage smoother, easier, and more consistent, while awkward fingering can make even a simple piece unnecessarily difficult.
There is not always one perfect fingering for every player or every piece. Hand size, musical context, tempo, and what comes before and after a note can all affect the best choice.
Still, there are several useful principles beginners can follow when learning proper piano fingering.
Piano Finger Numbers
Piano players use numbers to identify the fingers on each hand:
- 1 = Thumb
- 2 = Index finger
- 3 = Middle finger
- 4 = Ring finger
- 5 = Little finger
The numbering is the same for both hands. Your thumb is always finger 1 and your little finger is always finger 5.
Why Correct Piano Fingering Matters
The purpose of good fingering is not to follow rules for their own sake. It is to make playing more comfortable and musical.
Good fingering can help you:
- Play smoothly between notes
- Maintain an even rhythm
- Reach notes without unnecessary hand movement
- Play faster passages more reliably
- Develop consistent muscle memory
- Prepare your hand for the notes that come next
A fingering that works for one isolated note may be a poor choice if it leaves your hand in an awkward position for the next five notes.
1. Think Ahead, Not Just About the Note You Are Playing
One of the most important principles of proper piano fingering is planning ahead.
Do not choose a finger based only on the current note. Look at the notes coming next.
For example, if a melody continues upward across several notes, beginning with the wrong finger may force you to make an awkward jump later. A better fingering positions the hand so the phrase can continue naturally.
2. Keep the Hand Relaxed
Good piano finger placement should feel natural rather than forced.
Your hand should remain relaxed with gently curved fingers. Avoid stretching farther than necessary or twisting the wrist simply to avoid changing hand position.
If a fingering consistently creates tension, it is worth trying another option.
3. Use the Thumb Naturally
You may sometimes hear the rule that the thumb should never play a black key. That is too absolute.
Because the thumb is shorter than the other fingers, certain passages may be easier when fingers 2, 3, or 4 play the black keys. This is especially noticeable in some scale patterns.
But the thumb can absolutely play a black key when the musical passage or hand position calls for it.
For example, chords and many pieces naturally require the thumb to play a black key.
The better rule is:
Choose the fingering that keeps the hand comfortable and prepares you efficiently for the notes that follow.
4. Learn Standard Fingering for Scales
Scales are one area where standard fingering is especially valuable.
Learning established scale fingerings helps develop smooth thumb crossings, hand coordination, and efficient movement across the keyboard.
For example, the right-hand fingering for a C major scale ascending is commonly:
1-2-3-1-2-3-4-5
The thumb passes underneath after finger 3 so the hand can continue moving up the keyboard without jumping.
Practicing scales with consistent fingering helps those movements become automatic.
5. Use Finger Crossings Instead of Large Hand Jumps
When a melody extends beyond the five notes directly under your hand, you will often need to reposition.
Instead of lifting the entire hand and jumping whenever possible, piano technique frequently uses:
- Thumb-under movements
- Finger-over movements
- Small shifts of the hand
The exact movement depends on the direction of the phrase and which hand is playing.
The goal is to maintain a smooth musical line without unnecessary interruption.
6. Keep Fingering Consistent While Learning a Piece
Once you find a comfortable fingering for a difficult passage, try to use it consistently.
If you use different fingers every time you practice, your hands have to solve the movement again on each attempt.
Consistent fingering helps build muscle memory.
That becomes especially important as the tempo increases.
7. Printed Fingering Is a Recommendation, Not a Law
Many editions of piano music include suggested finger numbers.
These can be extremely helpful, particularly for beginners, but they are not always the only possible solution.
Different editions of the same piece may even recommend different fingerings.
This happens because editors may make different decisions about:
- Hand position
- Phrasing
- Speed
- Technical difficulty
- The intended level of the player
If the printed fingering feels awkward, consider whether another fingering allows you to maintain the phrase more comfortably.
8. Fingering Becomes More Important as Music Gets Difficult
In a simple melody played slowly, several finger combinations may work perfectly well.
As music becomes faster or more technically demanding, fingering becomes much more important.
Complex passages often require careful planning because a poor finger choice early in the phrase can create a problem several notes later.
This is particularly noticeable in scales, arpeggios, fast runs, and contrapuntal music.
Piano Fingering for Chords
Chord fingering depends on the shape of the chord and whether it is being played with the right or left hand.
For a simple three-note root-position chord, common fingerings include:
- Right hand: 1-3-5
- Left hand: 5-3-1
Other finger combinations such as 1-2-5 or 5-2-1 may be more comfortable depending on the chord shape and what comes next.
Again, context matters.
Piano Fingering for Beginners
Beginners should not become so worried about finger numbers that they stop thinking about the music.
Instead, use fingering as a tool.
When learning a new passage:
- Play it slowly.
- Notice where your hand feels awkward.
- Try a more efficient finger combination.
- Write the finger numbers into the music if necessary.
- Repeat the passage using the same fingering.
- Increase the tempo gradually.
Over time, many common finger movements begin to feel natural.
Should You Always Use the Same Piano Fingering?
Not necessarily.
For structured classical repertoire, consistent fingering is often especially important because it helps maintain phrasing, articulation, and technical control.
Improvisation can be more flexible.
When improvising, your hand may take different routes depending on the notes you choose in the moment.
Even then, efficient fingering matters. The difference is that there may not be a predetermined sequence of fingers written into the music.
Watch Experienced Pianists
One useful way to improve your fingering is to watch skilled pianists closely.
Pay attention to how little unnecessary movement they use.
Notice:
- When the thumb passes underneath
- When fingers cross over
- How the hand shifts position
- How relaxed the wrist remains
- How fingering supports the musical phrase
Good technique often looks easier than it actually is because the movements have become efficient.
The Goal of Good Piano Fingering
The goal of piano fingering is not to obey a complicated collection of rules.
It is to help your hands move comfortably while allowing the music to flow.
Use established fingerings as a starting point, especially for scales and technical exercises. Then consider your own hand size, the musical phrase, and what comes next.
If a fingering allows you to play smoothly, consistently, and without unnecessary tension, it is probably doing its job.
And once you find a fingering that works, practice it consistently enough that your fingers no longer have to think about it.
That leaves your attention free for the part that really matters: making music.
For more beginner piano guidance, explore our Hanon exercises for piano finger strengthening and our guide on how to play piano for beginners.
